How to Schedule WordPress Posts and Social Media From One Calendar
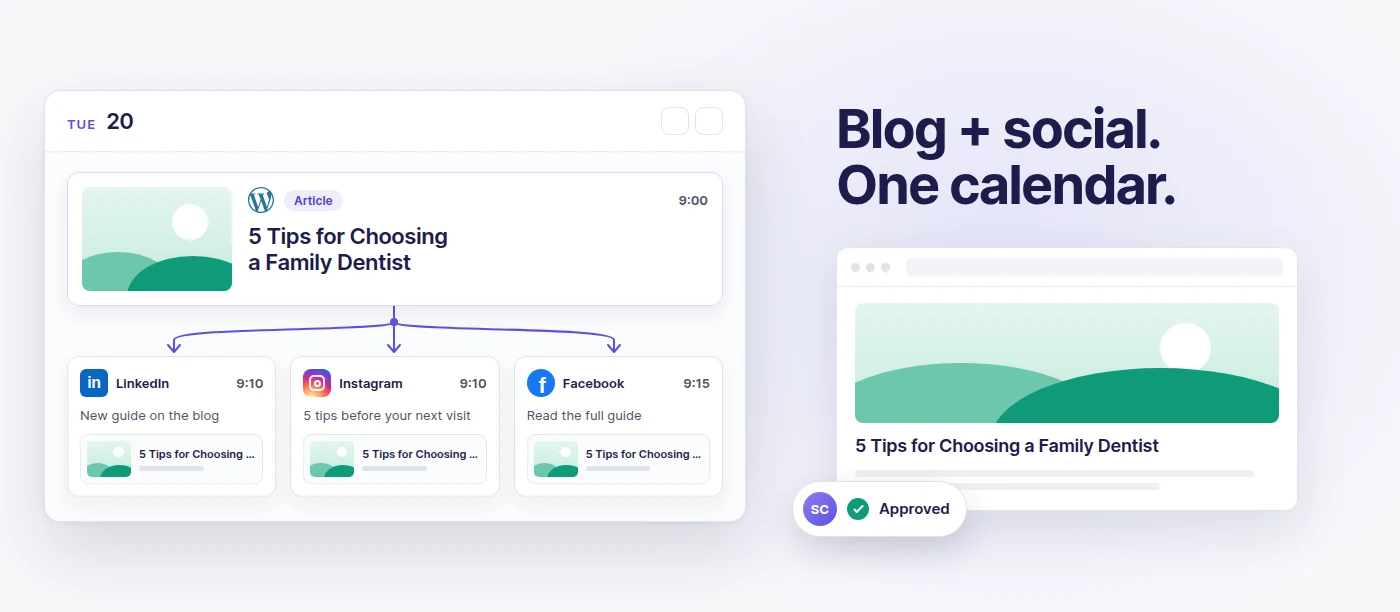
You can schedule WordPress posts and social media from one calendar by connecting your client’s WordPress site to the same tool you already use for Instagram, LinkedIn and Facebook. You write the article once and the client approves it once. It goes live on their site at the time you picked, and the social posts that promote it go out a few minutes later with the real link. No WordPress admin login per client, no copy-pasting between tools, and no social post pointing to an article that isn’t live yet.
This guide covers how that workflow runs for an agency, how to write the article with Claude, which images, GIFs and videos work on WordPress, and what to check on the security side.
The usual agency mess: blog in one place, social in another
If you manage content for several clients, a normal Tuesday probably looks like this:
- The blog post is drafted in Google Docs.
- The client leaves comments in the doc, you go back and forth by email, and someone says “looks good” in a thread you have to dig up later.
- You log in to the client’s WordPress admin (one of the twelve passwords in your password manager), paste the text, fix the formatting the paste broke, upload the featured image, pick categories, and hit Publish.
- You open your social scheduler, write three posts that promote the article, paste the link, and schedule them.
- On Thursday the client asks for a change in the article. Nobody updates the social posts.
Every step lives in a different tool, so every handoff is a chance for a mistake. The most common ones:
- A social post goes out before the article is published, and the link returns a 404.
- The client approved version 2 of the text, but version 3 went live.
- The featured image is missing alt text, or it’s a 6 MB PNG that slows the page down.
- The blog calendar and the social calendar disagree, so nobody knows what is actually going out this week.
None of this is hard. It’s just scattered, and scattered work is where agencies lose hours every week.
How the one-calendar workflow works
Here is the same Tuesday when the blog is just another channel in your scheduler. We’ll use Flomixy as the example, since that’s what we build, but the principles apply to any setup.
Step 1: Connect the client’s WordPress site (once)
You enter the site address, for example clientsite.com. Flomixy checks that it’s a WordPress site with the REST API available, then sends you (or your client) to the site’s own WordPress admin screen called Authorize Application. Click Approve and you’re connected.
What you don’t need:
- No plugin. Application Passwords have been built into WordPress since version 5.6.
- No shared admin password. WordPress creates a separate application password just for this connection, and it can be revoked at any time from the user’s profile.
- No developer. If the client doesn’t want to give you access to their admin, send them an invite link and they connect the site themselves.
Step 2: Write the article where you write everything else
Pick the WordPress site as a destination in the composer, next to the client’s social accounts. The article gets its own editor: a title, headings, lists, links, quotes, images and video inside the text. On the side you set the featured image with alt text, the excerpt, the URL slug, categories and tags.
If you paste from Google Docs or Word, headings, lists and links stay. Random fonts and colors don’t, so the post follows the client’s theme instead of looking like a pasted document.
Step 3: The client approves the article and the social posts together
The client opens their review portal and sees the article as an article, with its title, featured image and text, next to the social posts that will promote it. They approve everything once, or ask for changes on the part that needs it. Nothing goes live until it’s approved.
If the client prefers to do the final touches in WordPress themselves, choose Send as draft to WordPress. The article lands in their WordPress as a draft, ready for them to review and publish.
Step 4: The article goes live, then the social posts follow
At the scheduled time the article is published on the client’s site: featured image, images and video in the text, categories and tags included. The social posts are scheduled a few minutes after the article by default, and they carry the real permalink, filled in at the moment the article goes live.
If the article fails to publish (say the client’s site is down for maintenance), the social posts that link to it are paused automatically and you get a notification. Nobody shares a link to a page that doesn’t exist.
Step 5: Everything is in one calendar
The article and its social posts sit on the same day in the same calendar, each with its network icon. When the client asks “what are we publishing next week?”, you send one link instead of two spreadsheets.
Write the post with Claude
If you use Claude, you can run the whole workflow from a conversation. Flomixy has an MCP server, so Claude can create and schedule posts for you, while the client still approves them.
A prompt like this is enough:
Write a 1,200-word article about choosing a family dentist for the Smile Studio blog. Friendly tone, three H2 sections and a short FAQ. Schedule it for Tuesday at 9:00 in the category “Patient guides”. Then create a LinkedIn post and an Instagram caption that promote it.
Claude writes the article and checks which categories actually exist on the site, instead of inventing one. It then creates the article and both social drafts in your workspace. If the article needs an image, Claude asks where it should come from: a link you provide, your media library or a stock photo.
What doesn’t change: approval rules still apply. If the brand requires client approval, the article and the social posts wait for the client, exactly like posts you created by hand.
Images, GIFs and video that actually work on WordPress
WordPress is more flexible than most social networks, but a few rules save you from surprises.
Featured image
- Use JPG, PNG or WebP. They work on every WordPress host.
- Aim for at least 1200 × 630 pixels, so the image also looks sharp when the article is shared on social media.
- Very large images (over 2560 pixels on the long side) are scaled down by WordPress automatically. That’s fine, but there’s no reason to upload a 15 MB original.
- Always add alt text. It helps accessibility and image search, and it’s the first thing an SEO audit flags.
- Video can’t be a featured image. That is a WordPress rule, not a limitation of the tool.
GIFs
Animated GIFs work inside the article. As a featured image, keep in mind that most themes show a resized copy of the image in post lists and headers, and WordPress usually creates those copies as a still image (the first frame). If the animation matters, put the GIF inside the text.
Formats to avoid
- SVG is blocked by WordPress by default for security reasons.
- HEIC (iPhone photos) and AVIF only display correctly if the client’s hosting supports them. Convert them to JPG or WebP first, and the post will look the same on every host.
Video inside the article
- MP4 (H.264) plays in every modern browser. WebM works too.
- For long videos, upload them to YouTube or Vimeo and paste the link on its own line. WordPress turns it into a player automatically, and the client’s hosting doesn’t have to serve a heavy file.
- Every host has its own upload limit, often between 8 MB and 128 MB on shared hosting. If a video is too large for the client’s site, you get a clear message saying so, and the rest of the post still goes out. Ask the host to raise the limit, or use a YouTube link.
Will the post look the same as one written in WordPress?
Almost always, yes. The client’s theme decides fonts, colors and layout, not the tool you publish from. An article published through the scheduler uses the same template as one typed directly in WordPress.
Two differences worth knowing about:
- Page builders. If the client designs every single post with Elementor, Divi or a similar builder (custom columns, buttons, sections), a published article will use the theme’s standard post layout instead. It’s clean and readable, just simpler.
- The WordPress editor view. When someone opens the article in the WordPress editor later, the content appears as one Classic block instead of separate Gutenberg blocks. Visitors see no difference, and WordPress can convert it to blocks with one click.
Security: what you’re actually connecting
Connecting a site means storing a credential that can publish on it, so it’s worth doing properly.
- Use a dedicated user. Ask the client to create a WordPress user for your agency with the Editor or Author role, not Administrator. Editors can publish and upload media, and they can’t install plugins or change settings.
- Revoke at any time. The client can remove the application password from their WordPress profile in one click. Disconnecting the site in Flomixy deletes the stored credential right away.
- HTTPS only. WordPress only offers application passwords on sites served over HTTPS, so the connection is encrypted end to end.
- Encrypted at rest. The application password is stored encrypted and never shows up in logs.
Agency checklist
| Step | Who | Where |
|---|---|---|
| Create a WordPress user with the Editor role for the agency | Client | WordPress admin, Users |
| Connect the site (Authorize Application) | Agency or client via invite link | Accounts |
| Write the article and the social posts | Agency (or Claude) | Composer |
| Set featured image, alt text, categories, slug | Agency | Article sidebar |
| Approve article and social posts | Client | Review portal |
| Publish article, then social posts with the link | Automatic | Calendar |
| Check the live article and fix anything in WordPress if needed | Agency | Client’s site |
FAQ
Do I need to install a plugin on the client’s WordPress site? No. The connection uses Application Passwords, which are built into WordPress since version 5.6. The site needs to run over HTTPS and allow the WordPress REST API, which is the default.
Does it work with WordPress.com? It works with self-hosted WordPress sites (WordPress.org) on any hosting. WordPress.com sites are not covered in this version.
Can my client approve the article before it goes live? Yes. The client sees the article and the social posts in their review portal and approves them, or asks for changes. Nothing is published before approval when the brand requires it.
Can I send the article to WordPress as a draft instead of publishing it? Yes. Choose “Send as draft to WordPress” and the article lands in the client’s WordPress as a draft, ready for their final check.
What happens if the client’s site is down at publish time? The article is retried automatically. If it still can’t be published, you get a notification, and the social posts that link to it are paused so they don’t share a broken link.